Jim's Blog
Toggle navigation
Jim's Blog
Home
About Me
Archives
Tags
UEFI Operation
2021-12-22 01:51:22
839
0
0
jim
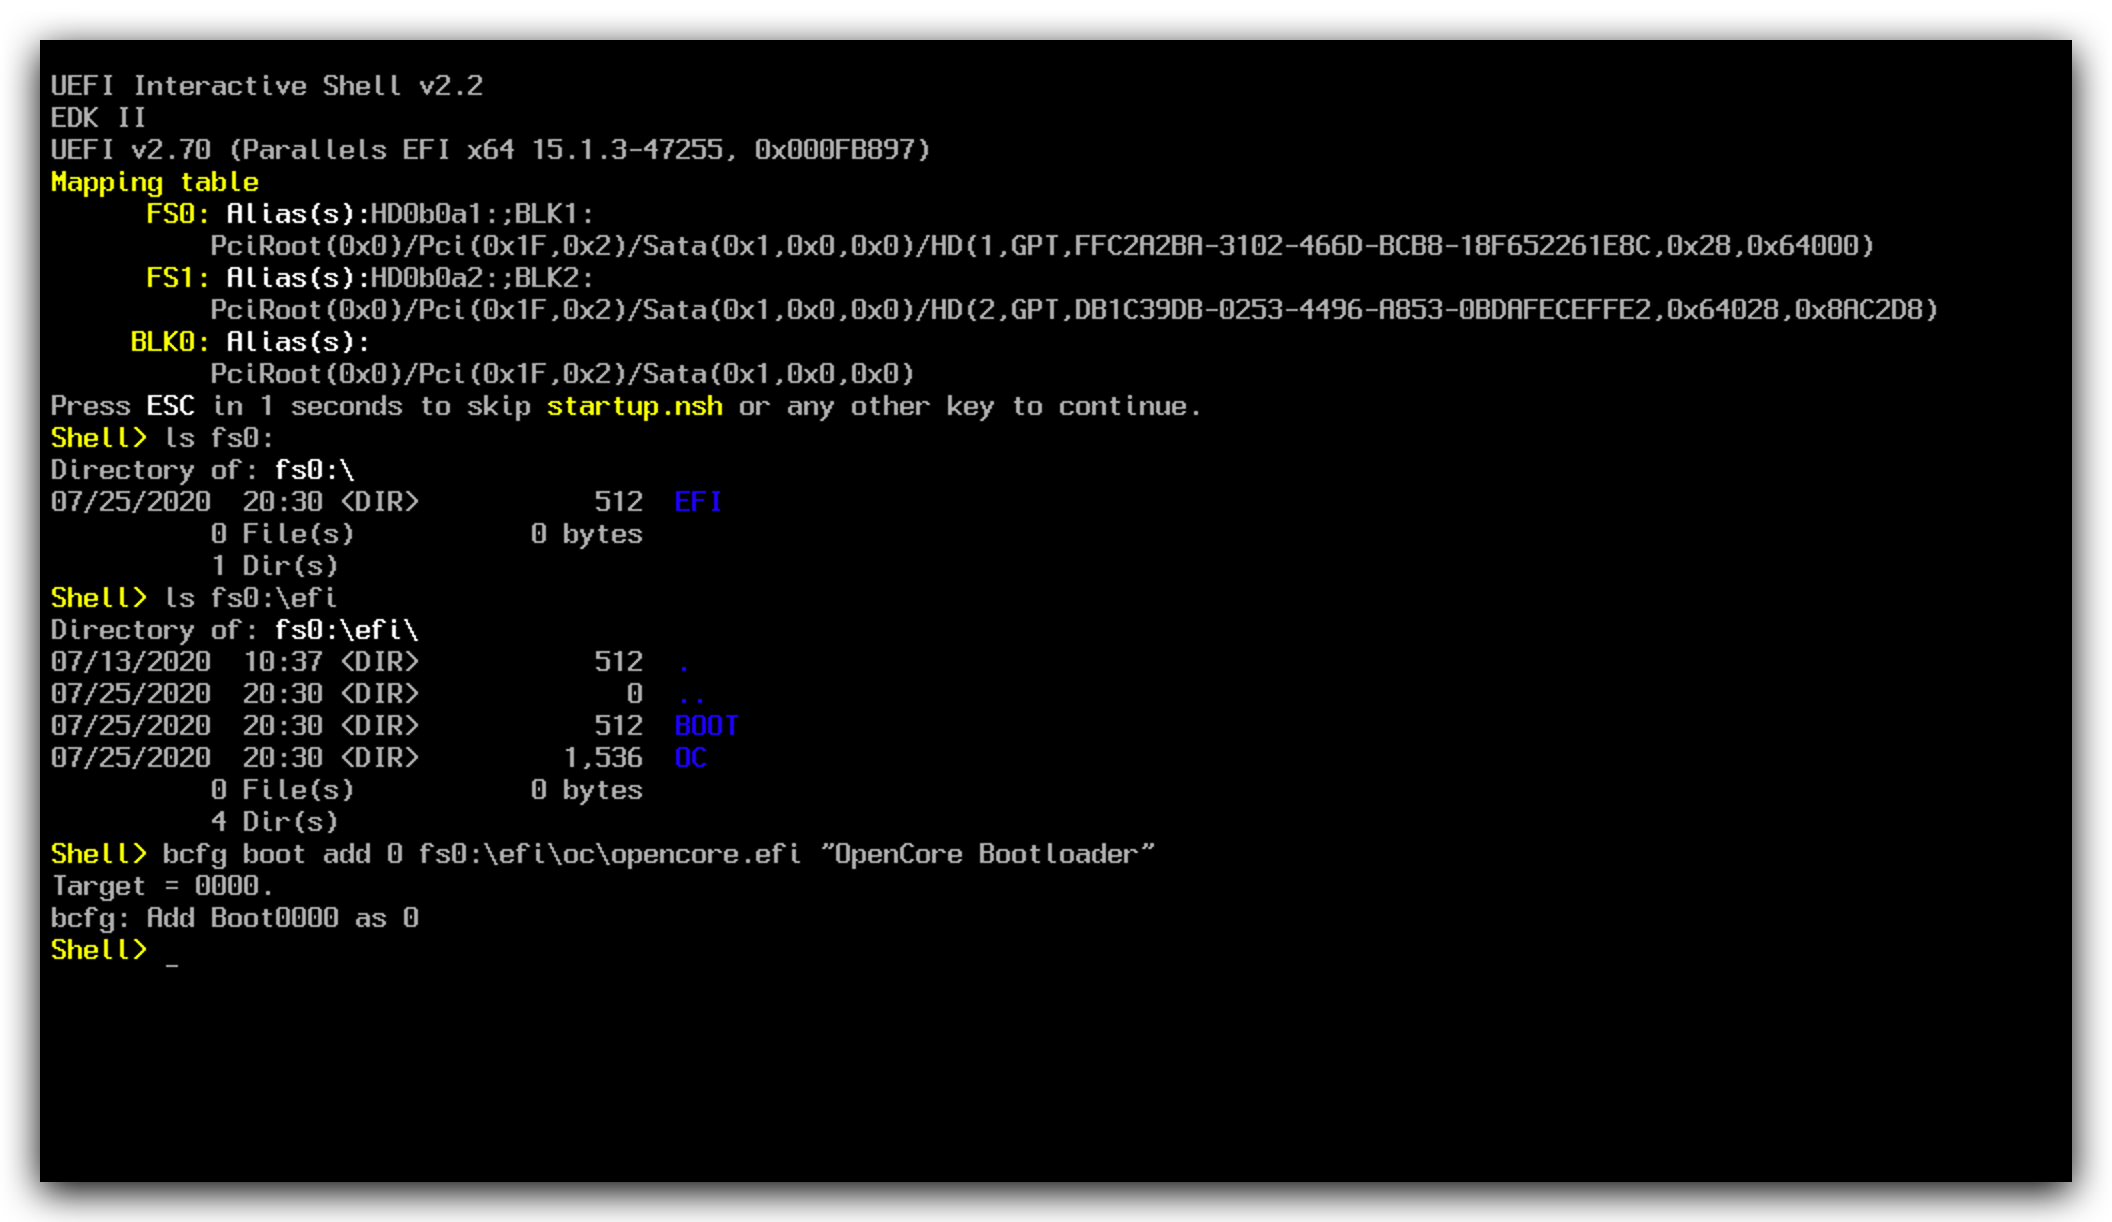
# Linux ## Update UEFI ``` # find and fix Windows update-grub2 ``` ## Add UEFI ⌘ ``` # efibootmgr -c -L "<label>" -l "\EFI\BOOT\BOOTx64.efi" -d /dev/<sdX> -p <Y> -u root=PARTUUID=<partuuid> efibootmgr -c -w -L "OpenCore" -d /dev/nvme0n1 -p 1 -l \\EFI\\BOOT\\BOOTx64.efi ``` # UEFI Shell > 1. https://blog.daliansky.net/Common-problems-and-solutions-in-macOS-BigSur-11.0-installation.html > 2. https://blog.daliansky.net/Common-problems-and-solutions-in-macOS-Monterey-12.0-installation.html 如何通过UEFI SHELL添加UEFI引导的正确姿势 无论是Clover还是OpenCore,经常会遇到的问题是:重置了NVRAM后就会导致UEFI引导项的丢失。正确的、最简单的插入姿势就是:进入UEFI SHELL (CLOVER)或者Open Shell(OpenCore),然后查看EFI所在的fsV 假如你的是fs0,那么如何判断fs0目录下面就是EFI呢,可以这样验证: ``` Shell> ls fs0: 如果显示有`EFI`的目录,那么就继续执行 Shell> ls fs0:\efi 显示`BOOT`和`OC`或者`BOOT`和`CLOVER`目录,那么可以确定这是你需要操作的位置 Shell> bcfg boot add 0 fs0:\efi\oc\opencore.efi "OpenCore Bootloader" 这是添加`OC`的引导项命令 Shell> bcfg boot add 0 fs0:\efi\clover\cloverx64.efi "Clover Bootloader" 这是添加`CLOVER`的引导项命令 Shell> exit 退出`UEFI Shell` ``` 
Pre:
Registry Authentication
Next:
自签CA并更新根证书
0
likes
839
新浪微博
微信
腾讯微博
QQ空间
人人网
Please enable JavaScript to view the
comments powered by Disqus.
comments powered by
Disqus
Table of content